
Domain setup
First thing’s first - go buy your domain on domains.google.com. They’re only £10 a year, but if I remember correctly there’s a £120 initial fee. Your mileage may vary depending on the popularity of your domain name. The process is pretty user friendly, even for a web noob like myself.
Once you’ve got your domain name, you’ll want to sort out some kind of hosting solution. I chose Firebase because I have tonnes of experience using their other product offerings, and I wanted to go the Google trifecta route of Google Domains/Firebase Hosting/Google Analytics. This may not be the perfect solution for you, but I figured that integrating the 3 would be fairly simple, and it was.
Hosting
Create a new project on the Firebase Console, head to Hosting and click Connect domain. Enter your fancy new .dev address and then Firebase will ask you to add a TXT record to your DNS provider to verify ownership.
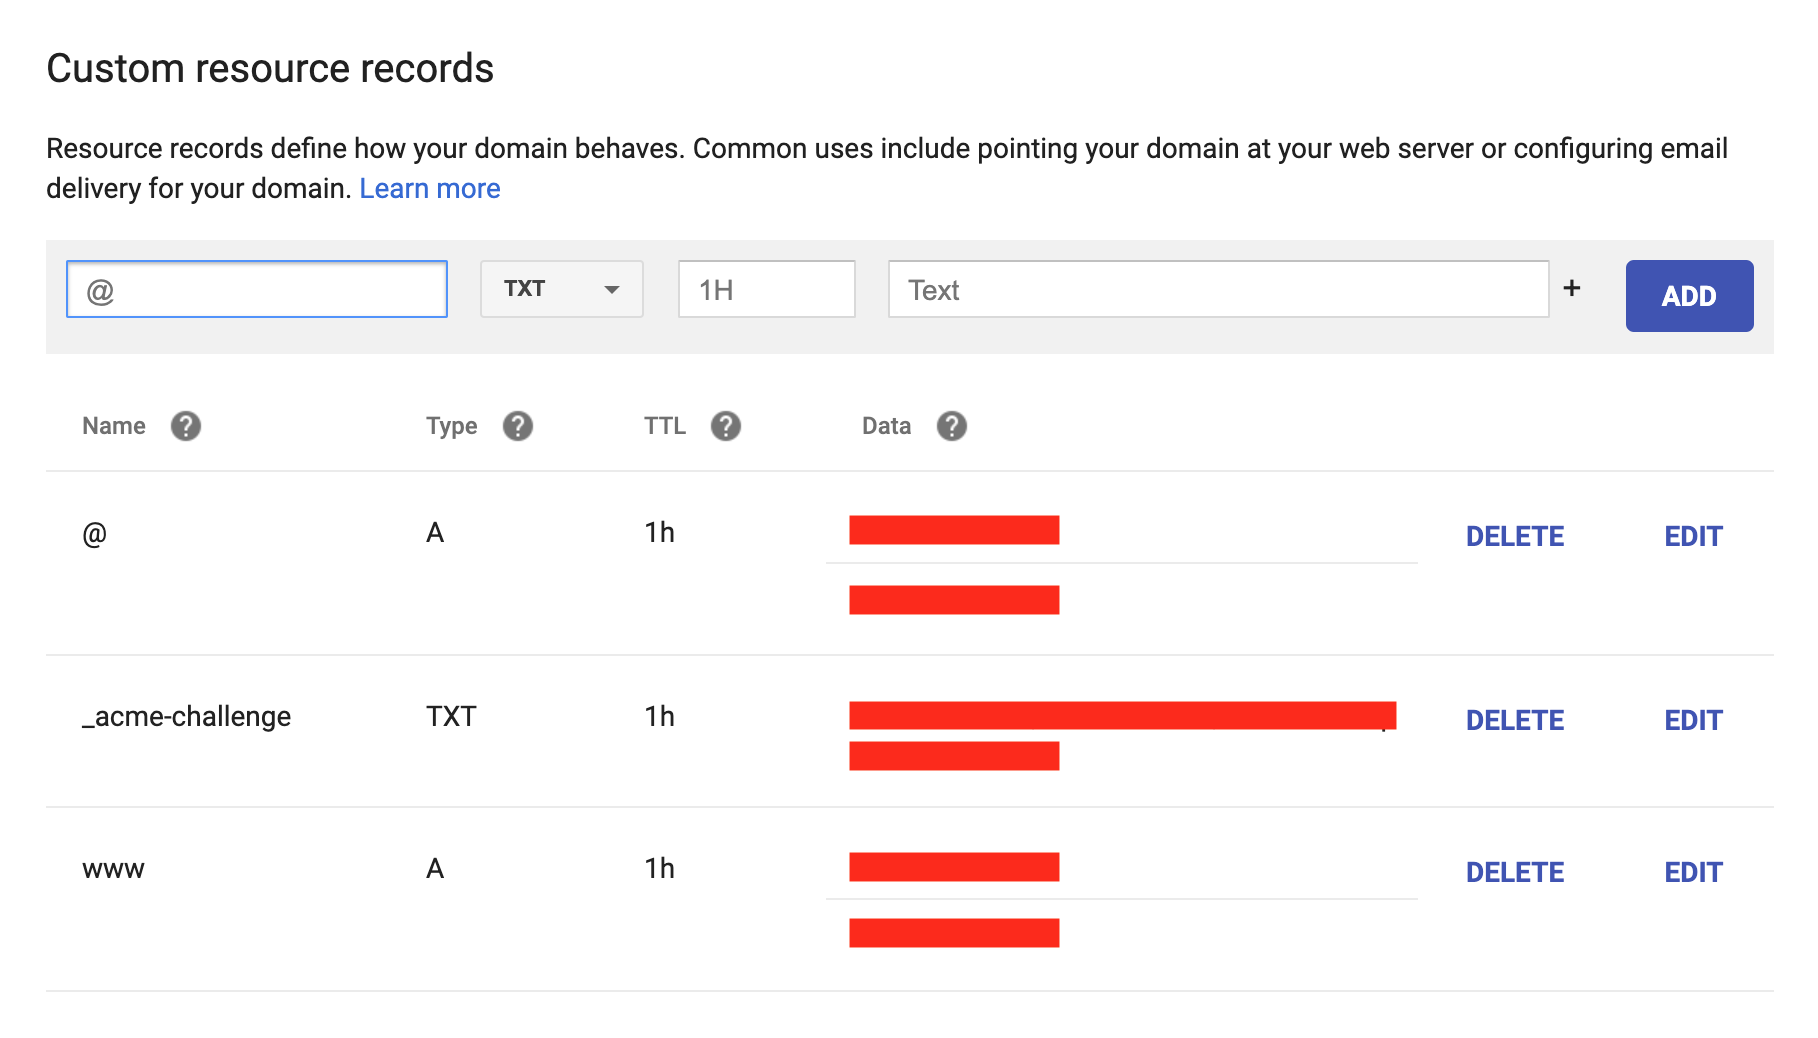
This meant absolutely nothing to me at the time, but it’s pretty simple. Copy the value, which will look something like google-site-verification=$some_hash, and head back to Google Domains. Choose DNS from the sidebar, scroll to the bottom to Custom resource records.
Here there’s an empty text entry box with “@” in it, and a dropdown with “A”. Click that dropdown and choose TXT, enter _acme-challenge in the text box with the “@” symbol, and enter your verification text in the remaining text box. Hit Add, and the first step is done. Back on Firebase, hit Verify, and wait for Firebase to connect your site.
Once that’s done, you’ll be told to add A records to your domain. There’s two of these IP addresses, and it’s not super obvious what to do with them.
Head back to Good Domains and Custom resource records, but this time you’ll want to leave the “@” symbol where it is, leave “A” pre-selected and then enter the first IP address. The bit that catches people out is that they don’t know how to enter the second IP - hit the little “+” button next to add, and enter the second IP. Once that’s done, hit Add. This should be the last messing around you’ll need to do here, and it can take a little while for changes here to propagate across the web, so make yourself a coffee and come back to it.
Hugo
Next, you’ll want to actually set up your blog. I chose Hugo because it’s open source and I didn’t want to touch any JS - I just wanted to get up and running quickly.
I’m not going to go into any real detail here - there’s tonnes of guides out there on how to set up Hugo and it’s a pretty easy process.
I spent a while browsing themes until I found something I like, and found getting up and running super easy, locally at least. Hugo is markdown-based, so I’d recommend using the excellent Macdown for editing your content.
As far as I can tell, all themes have support for Google Analytics, so hook that up too. Create a new project in the Analytics panel, copy the project code and add it to config.toml as googleAnalytics = "$your_code". Easy.
Firebase CLI
Next you’ll want to manually deploy your website using the Firebase CLI. Install it via npm install -g firebase-tools, and then use firebase login to authenticate yourself.
From here you can use firebase deploy to serve your site. It really couldn’t be simpler. But it could be automated…
I’d recommend creating a bash script in the root of your project so that you can serve your site locally with drafts enabled.
hugo --theme=hyde-y && firebase deploy -D
CircleCI
So you can deploy Hugo pretty easily from the command line on your computer, but it’s 2019 and I don’t want to have to remember commands specific to Hugo and Firebase, so I decided to use CircleCI to continually deploy. That way I can sync the GitHub repo with my website in it and make tweaks on my work machine if I notice something that needs changing, and I can just write/update a post, push to master and know that it’s out there in the wild.
Getting this working was surprisingly annoying and took an embarrassingly large number of trial and error attempts, as this was the first time I’ve used Orbs. These are super cool and there’s a couple of pre-defined orbs that are perfect for our use case.
Here’s the circle.yml file that I used to completely automate the deployment of my site:
version: 2.1
orbs:
  firebase-deploy: azdevs/firebase-deploy@1.0.0
  hugo: circleci/hugo@0.1.0

jobs:
  build:
    executor:
      name: hugo/cibuilds
    steps:
      - checkout
      - run:
          name: checkout Hyde-Hyde
          command: |
            mkdir themes && git clone https://github.com/htr3n/hyde-hyde.git themes/hyde-hyde
      - hugo/install:
          version: 0.55.4
      - hugo/hugo-build
      - persist_to_workspace:
          root: ~/project
          paths:
            - public
            - resources

  deploy:
    docker:
      - image: 'circleci/node:lts'
    steps:
      - checkout
      - attach_workspace:
          at: ~/project
      - firebase-deploy/deploy:
          token: '$your_token_here'
          alias: '$your_alias_here'
workflows:
  build-and-deploy:
    jobs:
      - build
      - deploy:
          requires:
            - build
You’ll need to generate a deployment token for Firebase, but the CLI makes this super easy: firebase login:ci. Copy and paste the resulting key into circle.yml, push a change to master and double check that your website deployed correctly.
And that’s it! You now have a continuously deployed website/blog that’s super easy to theme and maintain. I’m enjoying the experience of using Hugo to blog on and once set up it’s super smooth each time you want to write another post.